Enhance your Pipedrive security with SSO integration
Single Sign-On (SSO) is a powerful feature that simplifies user authentication by allowing users to log in once and access multiple applications. In this guide, we'll walk you through the steps to set up SSO integration in Pipedrive using Identity, the workforce and customer identity management solution from Celusion Technologies. Whether you're an IT administrator or a tech-savvy business owner, this step-by-step tutorial will help you seamlessly integrate SSO with Pipedrive.
Why SSO with Pipedrive?
Implementing SSO in Pipedrive offers several advantages:
- Streamlined User Experience: Users can access Pipedrive and other connected applications with a single login, reducing password fatigue.
- Enhanced Security: Centralized authentication through Identity minimizes security risks by enforcing stronger password policies and multi-factor authentication (MFA).
- Simplified Management: Administrators can easily manage user access and permissions from a single platform, reducing the administrative burden.
Prerequisites
Before you begin, ensure that you have the following:
- An active Identity account with administrator privileges and SAML enabled.
- A Pipedrive account with admin access.
- Basic understanding of SAML (Security Assertion Markup Language), the protocol used for SSO in Pipedrive
Step 1: Access the Identity Provider Server Profile
- Log in to the Identity Admin Console:
- Access the Identity Admin Console using your admin credentials.
- View Identity Provider Server Profile:
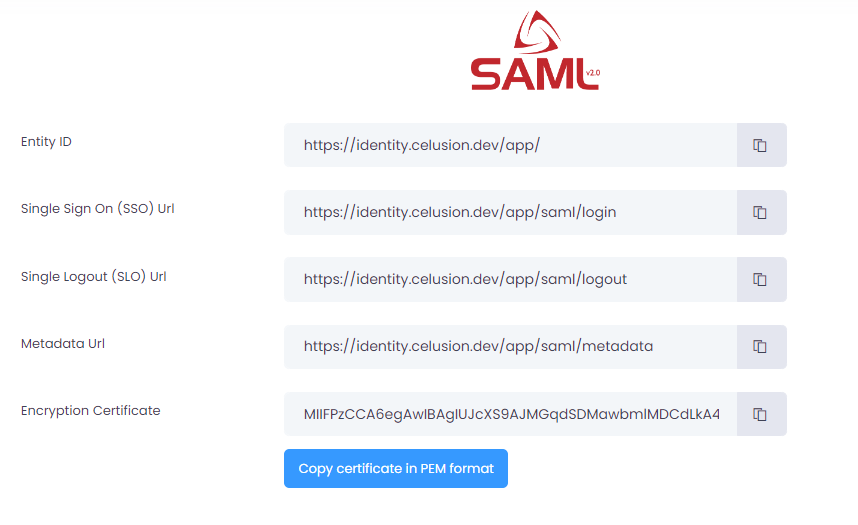
- Navigate to "Idp Server Profile" under "SAML 2.0"
- Keep the page accessible. You will need the values shown to configure Pipedrive to use Identity
Step 2: Configure Identity as the Identity Provider
- Access Pipedrive SSO Settings:
- Log in to your Pipedrive account and go to the "Company Settings" section.
- Navigate to "Security Center" and then select "Single Sign-On (SSO)."
- Enter Identity Provider Details:
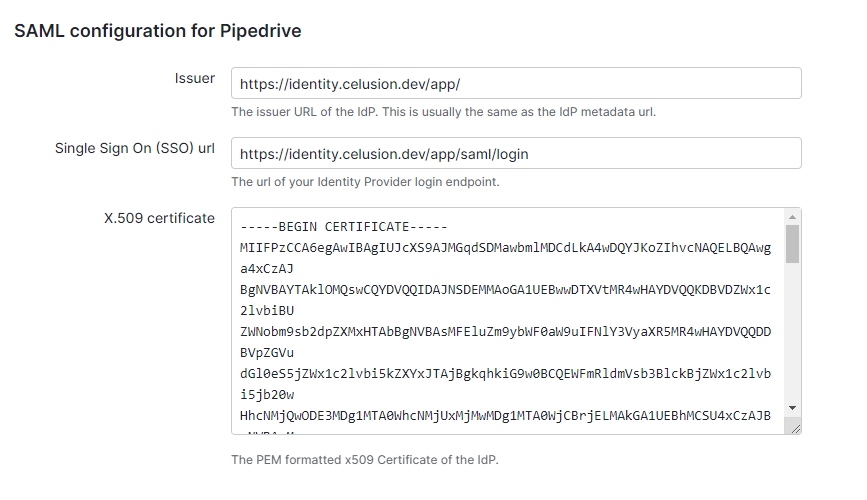
- Enter the Identity Provider (IdP) details you retrieved from the Identity Admin Console in Step1:
- Issuer This is the unique identifier for your Identity account. (https://identity.celusion.dev/app)
- Single Sign On (SSO) Url This is the Identity SSO endpoint URL. (https://identity.celusion.dev/app/saml/login)
- X.509 Certificate Upload the X.509 certificate from Identity to ensure secure communication between Pipedrive and Identity. Click on "Copy certificate in PEM format" and paste it to Pipedrive
- Enter the Identity Provider (IdP) details you retrieved from the Identity Admin Console in Step1:
Step 3: Configure Pipedrive as the Service Provider
- Log in to the Identity Admin Console:
- Access the Identity Admin Console using your admin credentials.
- Create a New Service Provider:
- Navigate to the "Service Providers" section under "SAML 2.0" and click on "New Service Provider."
- Enter Pipedrive Configuration Details:
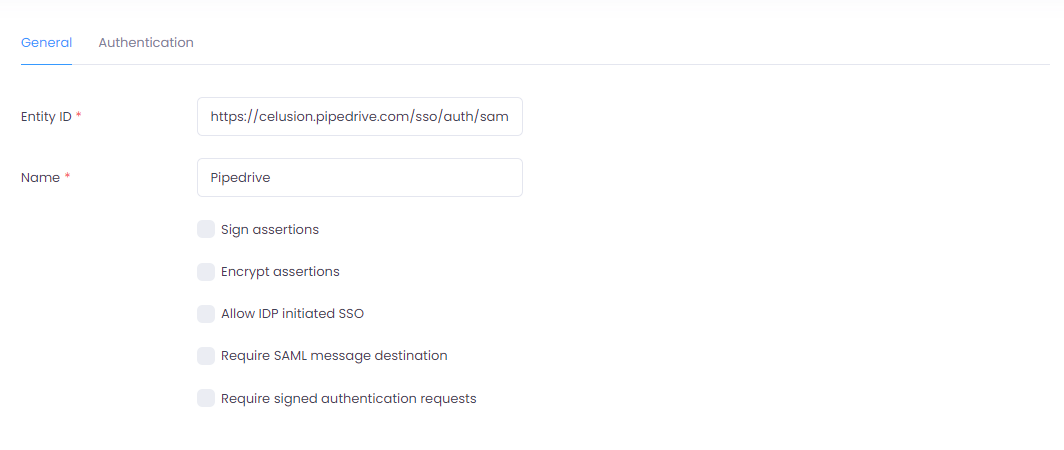
- In the Service Provider screen, enter the following details:
- Name Friendly name when displaying the service provider. (Pipedrive)
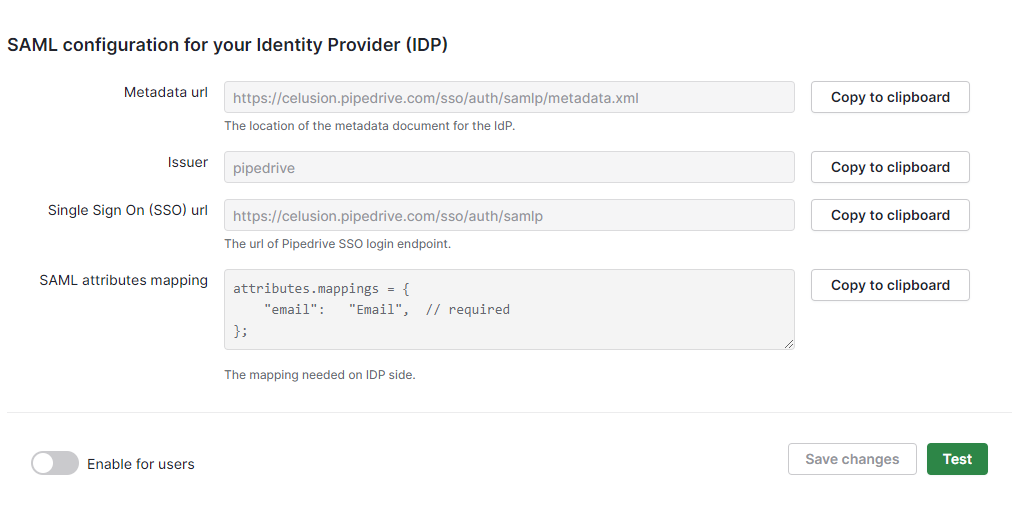
- Entity ID This is the unique identifier for your Pipedrive instance, found in the Pipedrive SSO settings. (https://celusion.pipedrive.com/sso/auth/samlp/metadata.xml)
- Assertion Consumer URI This is the URL where Pipedrive will receive authentication responses. You can find this URL in your Pipedrive account under the SSO settings. (https://celusion.pipedrive.com/sso/auth/samlp)
- Save the new Service Provider
- In the Service Provider screen, enter the following details:
Logout of Identity. This is required to ensure that a login prompt is shown when testing SSO from Pipedrive. If you do not logout, Pipedrive will attempt the SSO, with the current administrative user logged in to Identity.

Step 4: Test your Integration and get started
- Test your Pipedrive SSO settings
- Access your Pipedrive SSO settings
- Click on Test to initiate a SSO flow.
- Enter credentials in the Identity login screen presented. Ensure that the email address of the Identity user and the Pipedrive user match. This email address is used to associate the users between Identity and Pipedrive. If you login with a user that cannot be associated in Pipedrive, the SSO test fails.
- After entering the credentials, you should be redirected to Pipedrive
- Toggle the "Enable for users" switch to make your SSO integration available for all your Pipedrive users
- You can also "Enforce SSO login" for all users
- Inform Your Users:
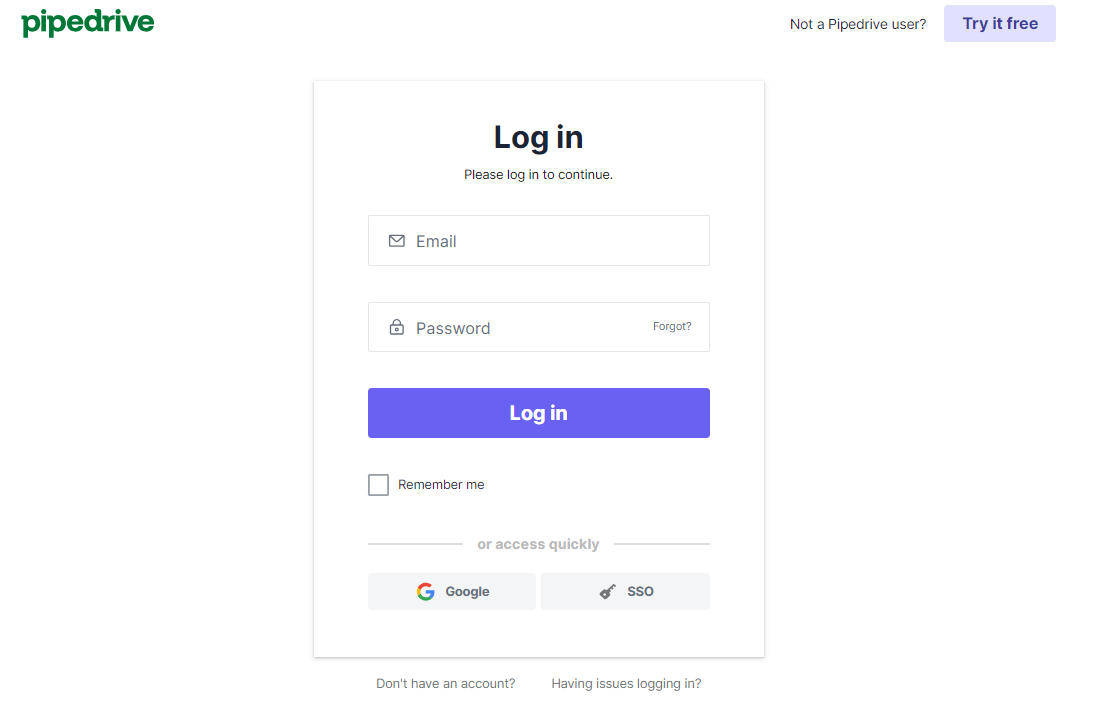
- Notify your users about the new SSO setup. Provide them with instructions on how to log in using Identity. You click on SSO on the login page, which will initiate the login screen in Identity and on successful login, take you to the home page in Pipedrive
- Monitor and Troubleshoot:
- Keep an eye on the integration for the first few days. Address any issues promptly by reviewing the logs in both Pipedrive and Identity.
Video Tutorial
We've also created a comprehensive video tutorial on YouTube that walks you through the entire SSO setup process in Pipedrive using Identity as the Identity Provider. Watch it here to see each step in action!
Conclusion
Setting up SSO integration between Pipedrive and Identity not only enhances security but also improves user experience and simplifies management. With these steps, you can ensure a smooth and secure authentication process for your team. If you encounter any challenges, both Pipedrive and Identity offer robust support resources to assist you.


