Setup Single Sign On (SSO) for Grafana with Identity
Single Sign-On (SSO) enables users to log in to multiple applications with a single set of credentials, enhancing both security and ease of use. In this guide, we will show you how to configure Grafana to use Identity as the Identity Provider, utilizing the OpenID Connect (OIDC) protocol for authentication.
This step-by-step guide will walk you through the process of integrating Grafana with Identity, ensuring your users have a seamless login experience while maintaining a secure environment.
Why SSO with Grafana?
Grafana is widely used for visualizing and monitoring data from various sources. However, managing user access and credentials across multiple tools and platforms can be tedious and pose security risks. Here’s why integrating SSO with Grafana is beneficial:
- Simplified User Experience Users can log in once and access multiple platforms, including Grafana, without needing separate usernames and passwords.
- Centralized Access Control Admins can manage user permissions and roles in one place, reducing the complexity of handling access across different systems.
- Enhanced Security By using a single, centralized authentication source, you reduce the risk of password mismanagement and improve your overall security posture.
- Enterprise Scalability As your organization grows, managing multiple credentials for various tools becomes unsustainable. SSO provides a scalable solution, allowing new users to be onboarded quickly with predefined roles and permissions.
Prerequisites
Before we begin, ensure the following:
- An active Identity account with administrator privileges
- A Grafana account with admin access.
- Basic understanding of OpenID Connect (OIDC), the protocol used for SSO in Grafana
Step 1: Register Grafana in Identity
- Log in to Identity as an administrator.
- Navigate to the Clients (OAuth 2.0 > Clients) and click on New Client.
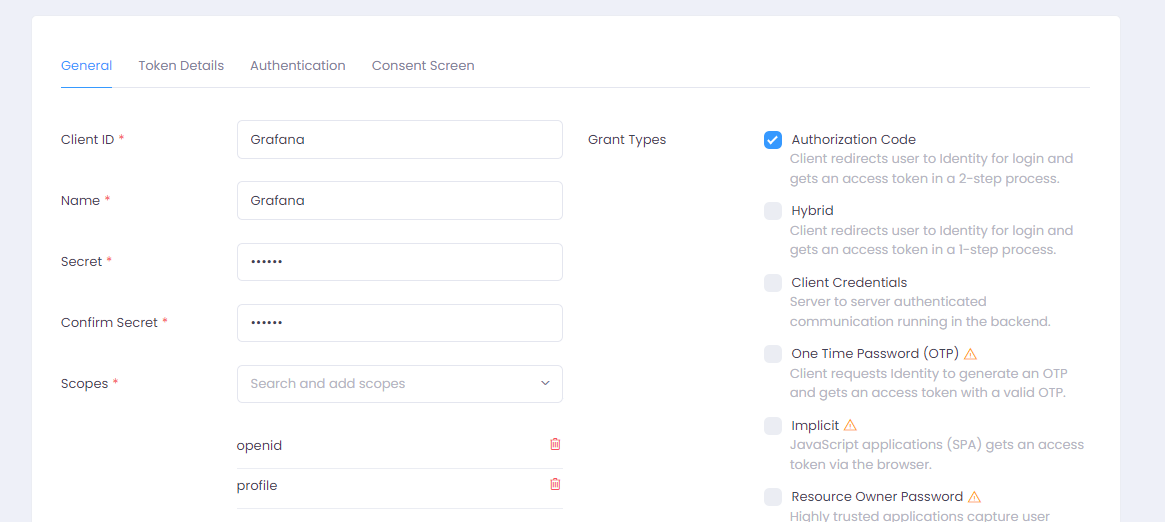
- Fill in the following details:
- Name: Grafana
- Client ID: Choose a unique identifier for Grafana, e.g., Grafana.
- Secret: Set the client secret and confirm it
- Scopes: Scopes define what user information will be shared. Set this to openid, profile
- Grant Type: Select the grant type Authorization Code
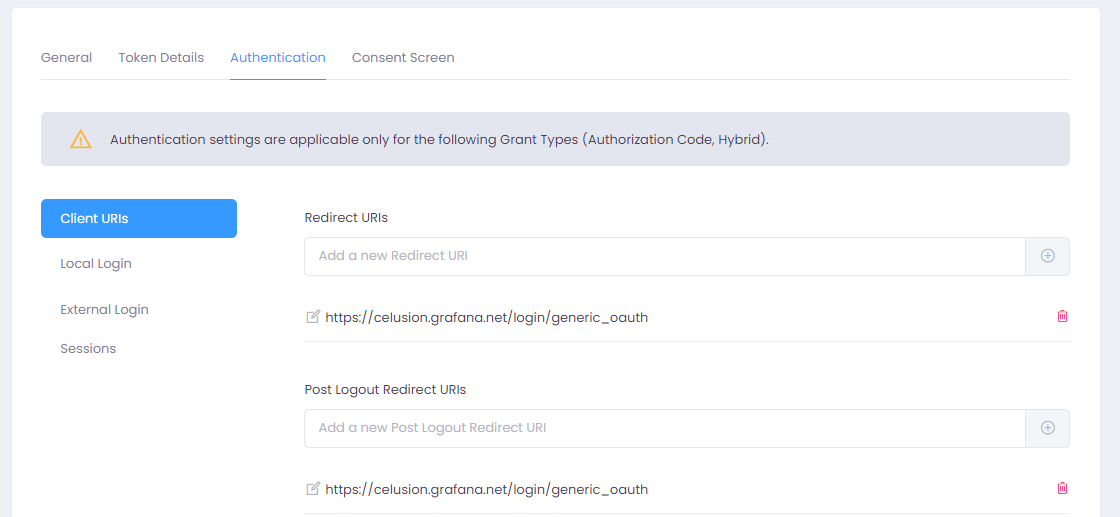
- Redirect URI: Set this to http://<grafana_url>/login/generic_oauth (replace <grafana_url> with your Grafana instance URL)
- Post Logout Redirect URI: Set this to http://<grafana_url>/login/generic_oauth
- Save your changes
Step 2: Configure Grafana to Use Identity as an OAuth Provider
- Log in to Grafana as an administrator.
- Navigate to Administration > Authentication.
- Click on Generic OAuth.
- Enable OAuth and fill in the following details:
- Display Name: Set this as Identity. This name will be displayed on your Login Button i.e. "Sign In with Identity"
- Client ID: Use the client ID you created earlier in Identity i.e. Grafana
- Client Secret: Enter the client secret generated in Identity.
- Scopes: Enter openid profile
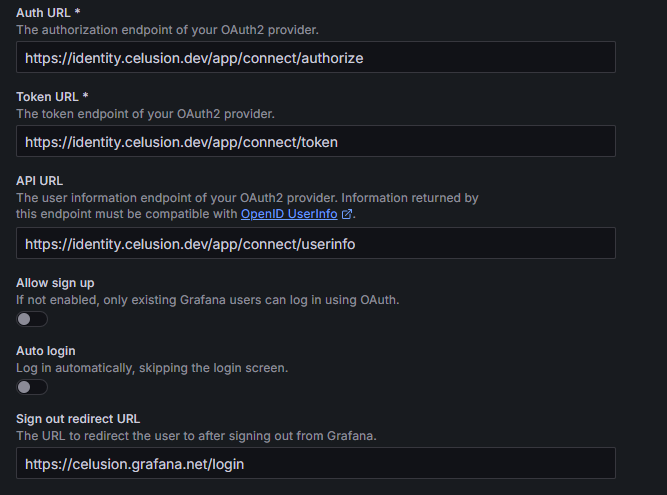
- Auth URL: https://<identity_domain>/connect/authorize (replace <identity_domain> with your Identity server’s URL). E.g. https://identity.celusion.dev/connect/authorize
- Token URL: https://<identity_domain>/connect/token
- API URL: https://<identity_domain>/connect/userinfo
- Allow Sign Up: Disable this to prevent users to sign up automatically when they log in via SSO.
- Sign out Redirect URL: Set this to http://<grafana_url>/login
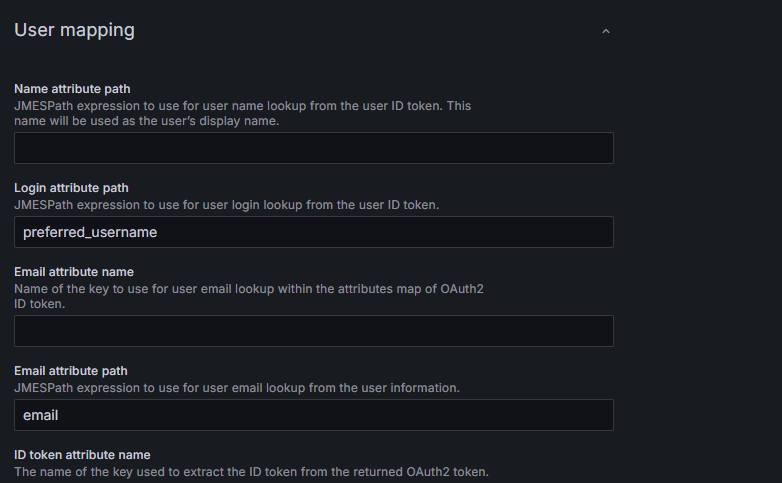
- Expand User mapping and set the Login attribute path to preferred_username
- Under User mapping set the Email attribute path to email
- Save the configuration.

Step 3: Test the Integration
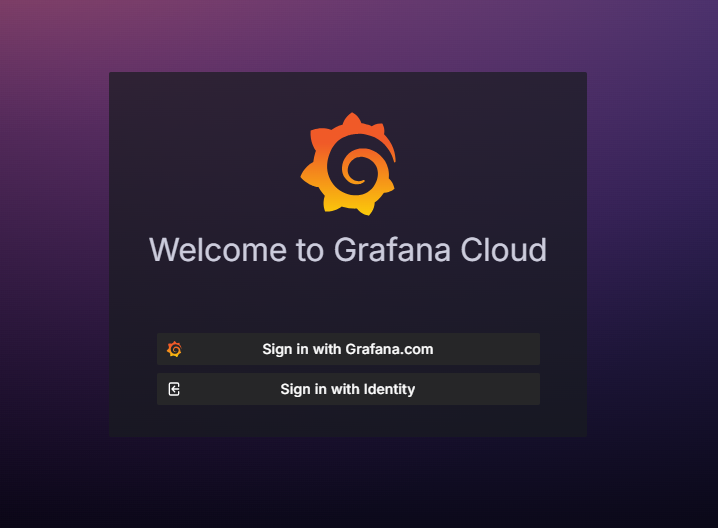
- Navigate to your Grafana instance login page
- You will be shown an additional button "Sign In with Identity"
- Click the Sign In with Identity button
- Enter credentials of a user who has access to Grafana. i.e. The username in Identity and the username in Grafana should be the same
- Complete the login process. After authentication, you will be redirected to Grafana.
Video Tutorial
We've also created a comprehensive video tutorial on YouTube that walks you through the entire SSO setup process in Grafana using Identity as the Identity Provider. Watch it here to see each step in action!
Conclusion
By integrating Grafana with Identity for Single Sign-On using OIDC, you simplify user authentication and centralize access control across applications. This integration enhances security and provides a seamless experience for your users.
If you encounter any issues during the setup process, check both Grafana and Identity logs for any configuration errors. For further assistance, feel free to contact our support team or refer to the official Grafana and Identity documentation.


