Integrating Google as an Identity Provider with Identity
Introduction
In today's interconnected world, offering users the ability to sign in using their preferred identity providers has become essential. Google, being a widely used service provider, is often the first choice for Single Sign-On (SSO) integrations. In this post, we will guide you through the steps of integrating Google as an Identity Provider using Identity, our comprehensive identity server solution that supports OAuth2, SCIM, SAML, and OpenID Connect protocols.
What You'll Need:
- Access to the Identity server.
- A Google Cloud project.
- Administrator privileges on both Identity and Google Cloud.
Step 1: Set Up a Google Cloud Project
Before we can integrate Google as an identity provider, you'll need to create a Google Cloud project. Here’s how:
- Go to Google Cloud Console and log in.
- Create a New Project:
- Click on the project dropdown and select “New Project.”
- Enter a project name and organization details, then click Create.
- Enable APIs:
- Navigate to the API & Services dashboard.
- Enable the Google+ API for authentication purposes.
Step 2: Set Up OAuth Credentials in Google Cloud
- Go to Credentials Tab:
- From the API & Services dashboard, click Credentials.
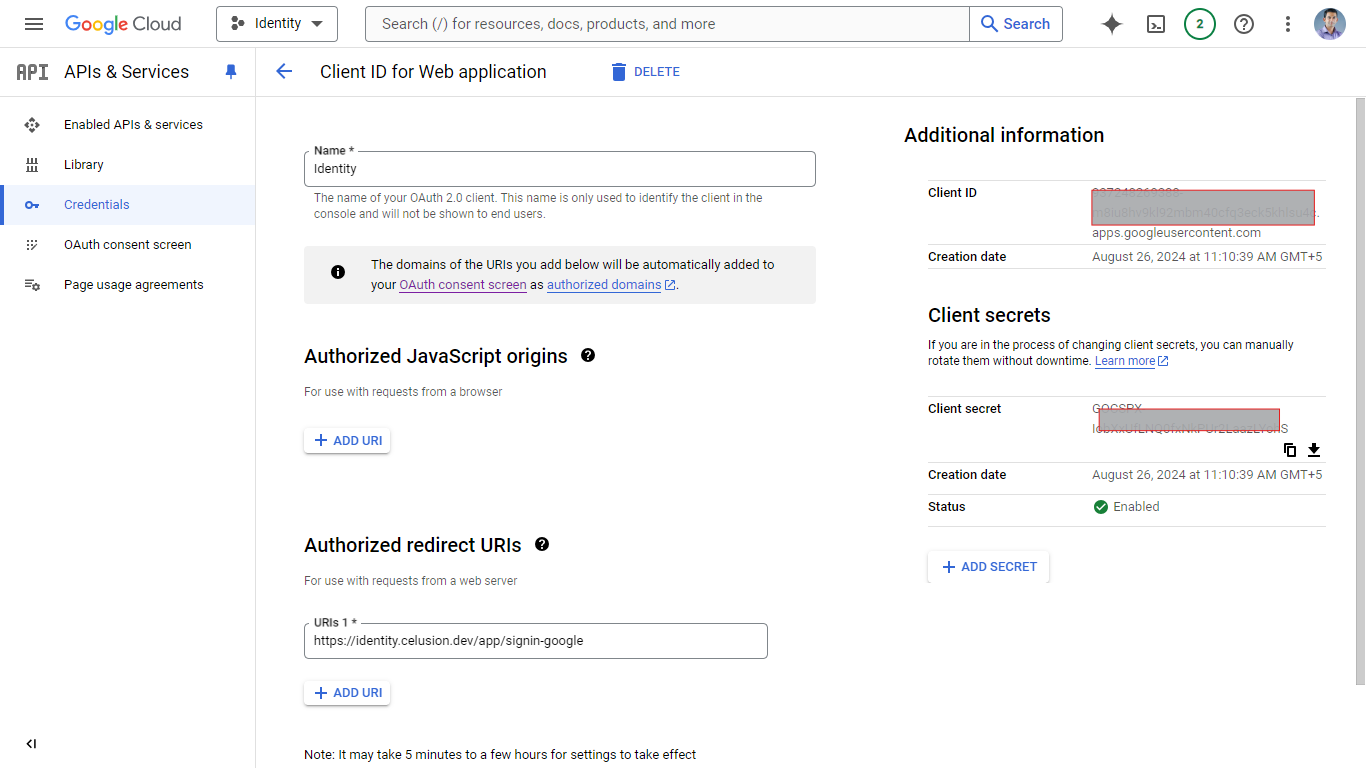
- Select Create Credentials and choose OAuth 2.0 Client IDs.
- Create OAuth 2.0 Client ID:
- Choose “Web Application” as the type.
- Enter a name, then add the Authorized redirect URIs that will point back to your Identity server i.e. https://identity.celusion.dev/app/signin-google.
- Save Your Client ID and Secret:
- Google will generate a Client ID and Client Secret. You will need these for the next steps.

Step 3: Configure Identity to Use Google as an Identity Provider
Now, we’ll configure your Identity server to accept Google as an external provider.
- Log into Identity Admin Console:
- Access the Identity management dashboard.
- Navigate to the External Identity Providers Section:
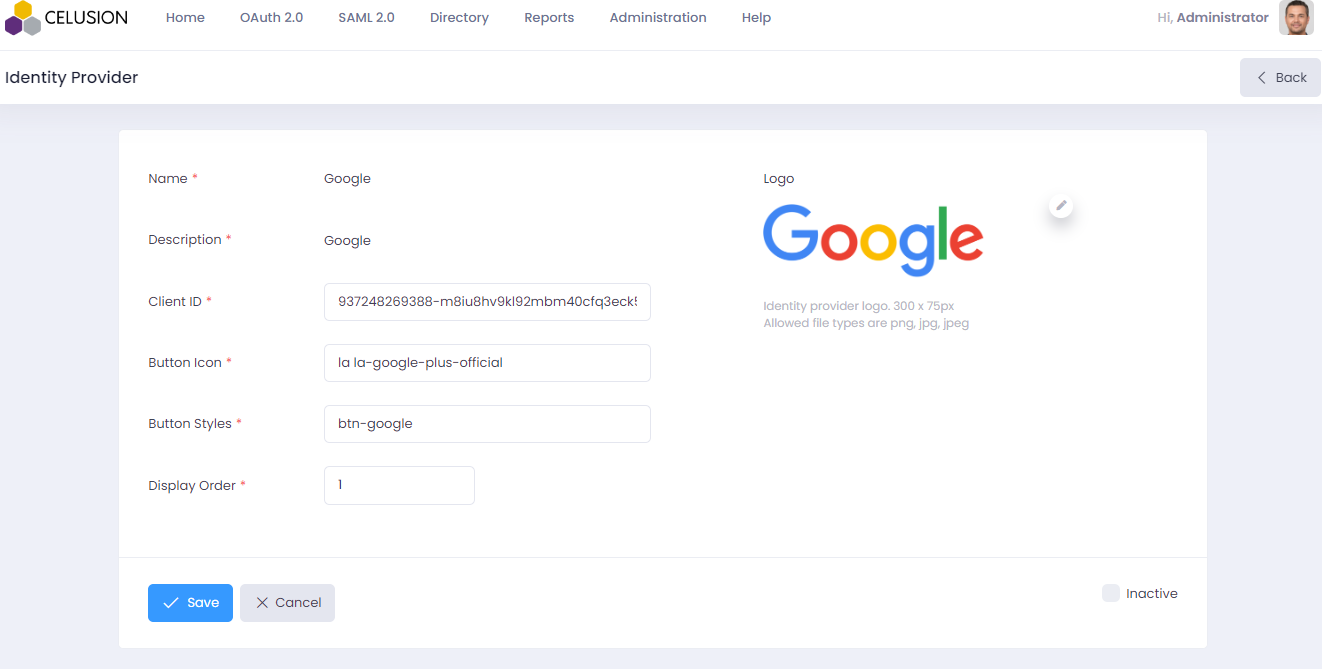
- Administration > Providers > Identity Providers
- Google is already listed as an Identity Provider.
- Enter Google Credentials:
- Click on Edit and fill the Client ID
- Enable Google by unchecking the 'Inactive' checkbox
- Against Google click the Key icon to set the Client Secret
- Save the Client Secret
- Enable External Login:
- Navigate to Administration > Settings
- Under External Login - Select 'Allow external login'
- Toggle the Google switch to On
- Save and Test Configuration:
- Save the configuration and run a test to ensure the integration is successful.


Step 4: Testing the Integration
Once the setup is complete, test the integration to ensure everything works as expected:
- Link your Google Account:
- Login to Identity with your credentials
- Navigate to My Profile > External Login
- Click 'Connect' against Google
- You will be redirected to the Google login page
- Enter your Google credentials on the Google login page
- Your Identity account is now linked to a Google account
- Log Out and Try Signing In via Google:
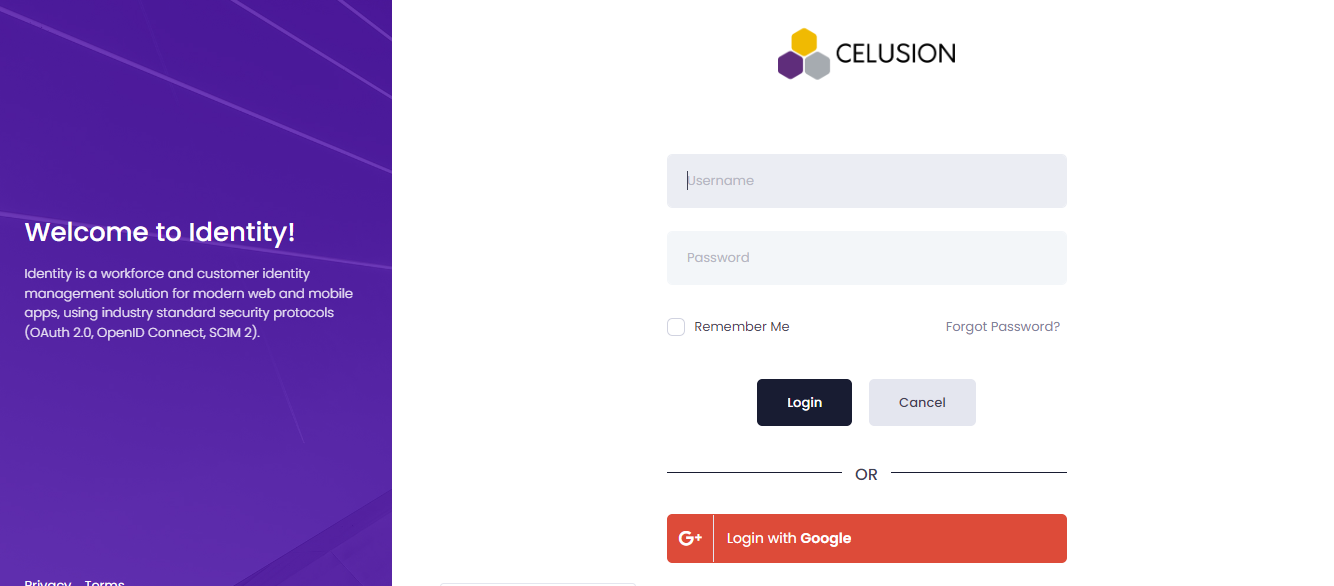
- Navigate to Identity’s login page.
- You should now see Google as one of the available identity providers.
- Confirm Successful Login:
- Click Login with Google
- If you are already signed in to Google, you will be redirected to the home page of Identity

Video Tutorial
We've also created a comprehensive video tutorial on YouTube that walks you through the entire SSO setup process with Google as the Identity Provider. Watch it here to see each step in action!
Conclusion
Integrating Google as an identity provider using Identity is a straightforward process that enables you to offer users a secure and familiar sign-in option. By leveraging OAuth 2.0 and OpenID Connect protocols, you ensure compliance with modern authentication standards while enhancing user experience. With Identity, integrating multiple providers is seamless, scalable, and secure.
Stay tuned for more tutorials on integrating additional identity providers!

.jpg)
.jpg)


